

Overview
Two-factor authentication adds a second step when you sign in. As well as your password, you enter a short code from an app on your phone. The two steps are deliberately different kinds of thing:
That combination is what makes it strong. A password can be guessed, reused across sites, exposed in a breach of some service that has nothing to do with Pear, or handed over to a convincing email. All of those happen at a distance, to thousands of people at a time. Taking your phone out of your pocket does not scale the same way.
So with two-factor authentication switched on, someone who has your password still cannot reach your account. They would need your phone as well, and they are not in the room.
You will find it in Settings, under Two-factor authentication. Open Settings by clicking your name at the bottom of the left menu.
Why we keep bringing it up
Multi-factor authentication is one of the eight mitigation strategies in the Essential Eight, the baseline the Australian Signals Directorate recommends to every organisation. It is on that list for a simple reason. Of all the things you can do to protect an account, requiring a second factor stops the largest share of real attacks for the least effort. Stolen and reused passwords are how most account compromises begin, and a second factor ends that route on its own. If your organisation is working towards the Essential Eight, or answering questions about it from an insurer, an auditor or a customer, turning this on across your team is one of the clearest pieces of evidence you can point to.Is it required?
Not yet. Today it is opt-in, and you decide whether to turn it on. In the meantime, Pear Australia strongly recommends it on every account, and particularly on accounts that can see information about patients, customers or staff. Call recordings, transcripts, faxes and contact details are all personal information, and the people they belong to did not choose your password. A second step is the single most effective thing you can do to keep that information where it belongs. If your practice or business handles health information, your own privacy obligations are a good reason to turn it on across the team now rather than leaving it to individuals.How signing in works once it is on
- Enter your email and password as usual.
- Enter the six-digit code from your authenticator app.
- You are signed in.
Turn on two-factor authentication
You will need an authenticator app on your phone. You may well already have one, since the same apps are used for Microsoft 365, banking and plenty of other services. If you do, use it. There is no need for a second one. If you do not have one yet, either of these is free and takes a minute to install:
Authy and the authenticator built into 1Password work equally well. Any app that supports standard authenticator codes will do, so use whichever you already trust.
Step 1. Go to Settings and find Two-factor authentication, then click Set up two-factor authentication.
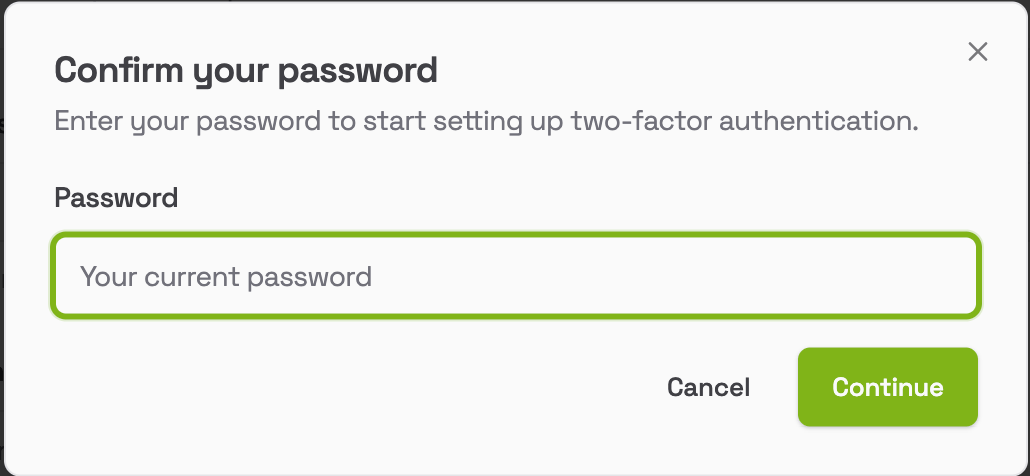
Step 2. Confirm your password. This is to make sure it is you setting this up and not someone who has wandered up to your unlocked computer.
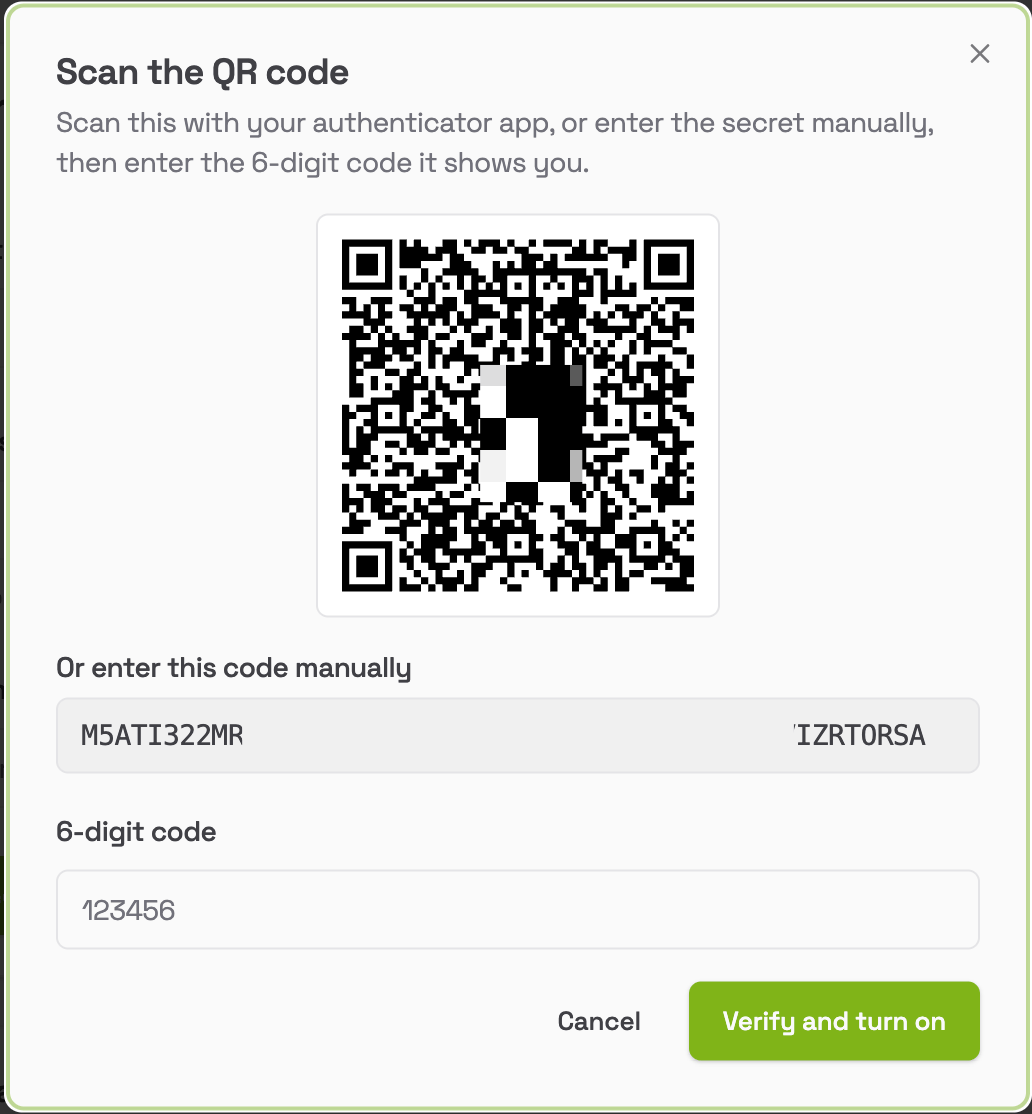
If it says the code is wrong, you have most likely typed one that has just expired. Wait for the app to show a fresh code and try that one.
Backup codes
When you turn two-factor authentication on, you are given a set of one-time backup codes. Each one signs you in once, in place of a code from your app. They exist for the day your phone is lost, stolen, wiped or simply flat, so keep them somewhere you can reach without that phone. A password manager is ideal. A note in your desk drawer is better than nothing. A screenshot on the phone itself defeats the purpose. If you use some of your codes, or you are not sure they are still private, click Regenerate backup codes in Settings. You will confirm your password, and a fresh set replaces the old one. The old codes stop working immediately.If you cannot reach your authenticator app
By default, you can ask for a code by email instead. On the sign-in screen, choose to have a code emailed to you and enter that. This is convenient, and for most people it is the right setting. It is also the weaker of the two routes, because anyone who can read your email can then complete your sign-in. If you would rather your account depended only on your phone and your backup codes, turn off Allow a login code by email if I lose my authenticator in Settings. Turning it off makes your account stronger. It also means that if you lose both your phone and your backup codes, you will need to contact Pear support to get back in.Turn off two-factor authentication
- Go to Settings and find Two-factor authentication.
- Click Turn off.
- Confirm your password.
Worth knowing before you turn it off: two-factor authentication is becoming mandatory for the Pear Portal in the coming months. If you are switching it off to move to a new phone, it is quicker to turn it off and straight back on with the new device than to leave it off and set it up again later.
If you are locked out
Work through these in order.- Use one of your backup codes.
- If email codes are still enabled on your account, ask for a code by email.
- Contact Pear support. We can clear two-factor authentication from your account so you can sign in with your password and set it up again. You will get an email confirming this was done, so if one ever arrives unexpectedly, tell us straight away.
Codes from an authenticator app depend on your phone’s clock. If your codes are being rejected and you are certain they are correct, check that the date and time on your phone are set automatically.
The occasional reminder
If you have not turned two-factor authentication on, a prompt about it appears from time to time.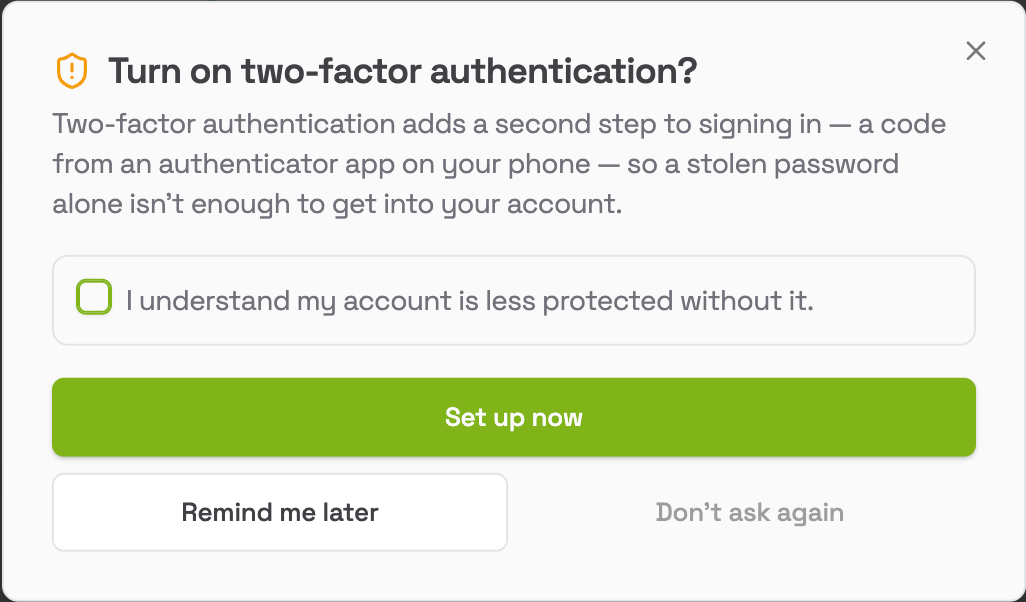
Closing the prompt with the X, or pressing Escape, counts as Remind me later. Nothing is decided by accident.